The trigger formerly called “Assign botBrains [DO NOT EDIT]” has been renamed to “[botBrains] Assign AI”. If your account still uses the old name, it works the same way.
The 3 Necessary Triggers
You need at least 3 triggers to make botBrains work in your Zendesk:[botBrains] Assign AI
[botBrains] Assign AI
This trigger is auto-created and by default targets all new tickets created.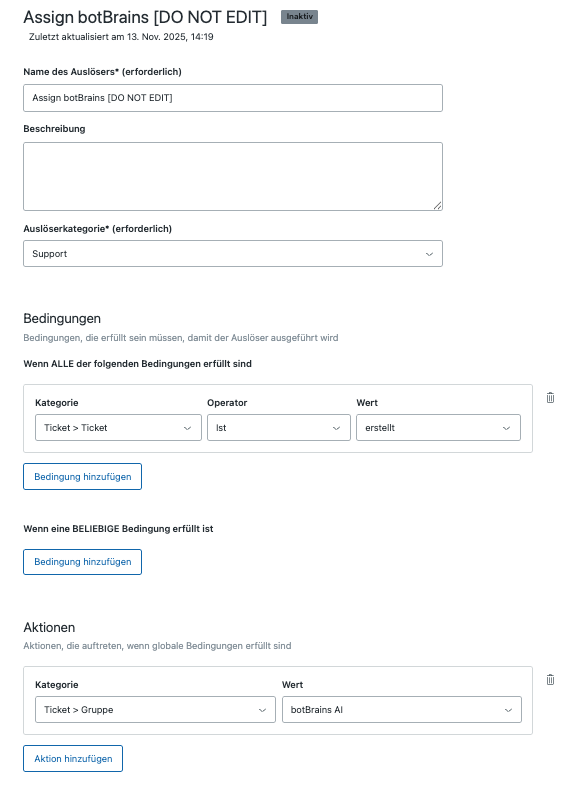
[botBrains] Escalated by AI
[botBrains] Escalated by AI
This handles how escalations from the botBrains AI are handled in your system. If you want to escalate to different groups based on a field (for example, Topic annotated by AI), duplicate this rule and add the additional field under ALL conditions and change the target group.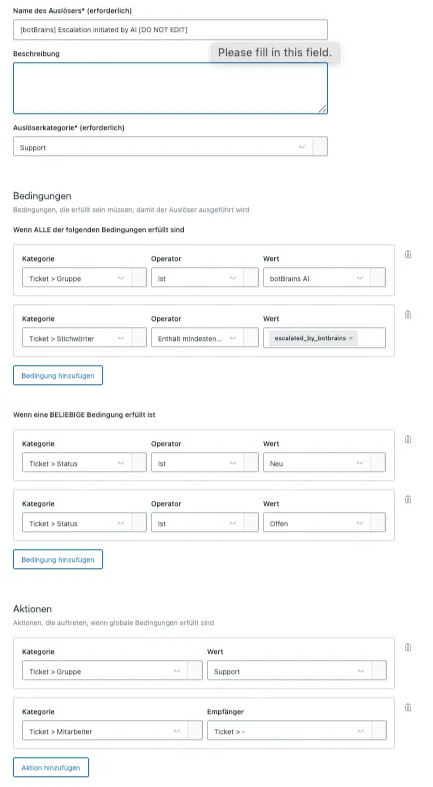
[botBrains] Escalated by Human
[botBrains] Escalated by Human
This handles how escalations by your customers forcing to speak to a human will be handled.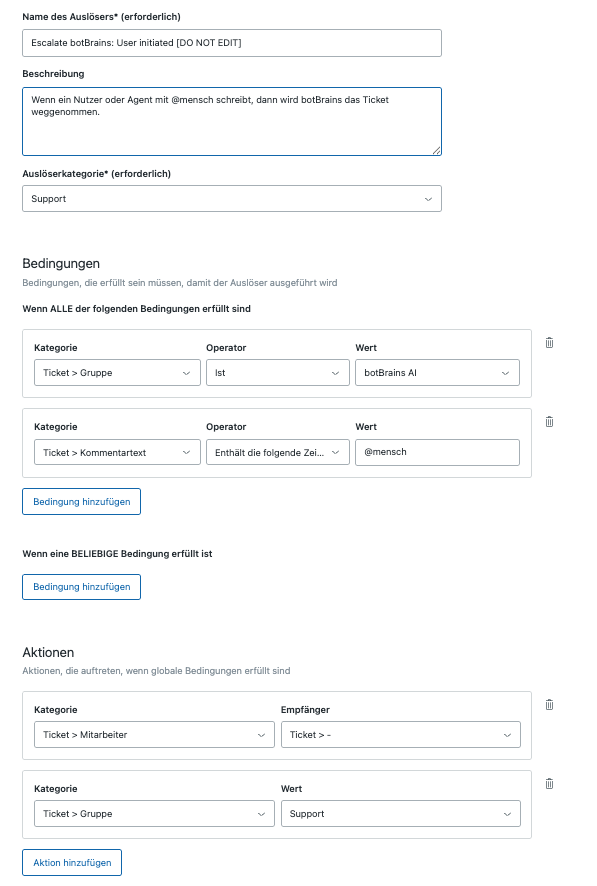
Configuring When botBrains Should Answer
You can configure which tickets botBrains should process with the trigger “[botBrains] Assign AI”. While the name suggests differently, it’s actually intended that you steer in which cases botBrains should run. Common customizations include:-
Exclude automated requestors - Some email addresses belong to automated systems. Examples include
service@paypal.deandebay@ebay.com. If it’s difficult to exclude them in Zendesk, you can also use Settings > Triggers and configure Block rules in botBrains. -
Limit channels - If you support emails and voice calls, you likely don’t want to respond to empty ticket transcripts. Filter by
Ticket > Channelany ofemailandwebform. -
Limit brands - Use filters like
Ticket > Brand is XYto restrict botBrains to specific brands.
Adding the Legal Disclaimer
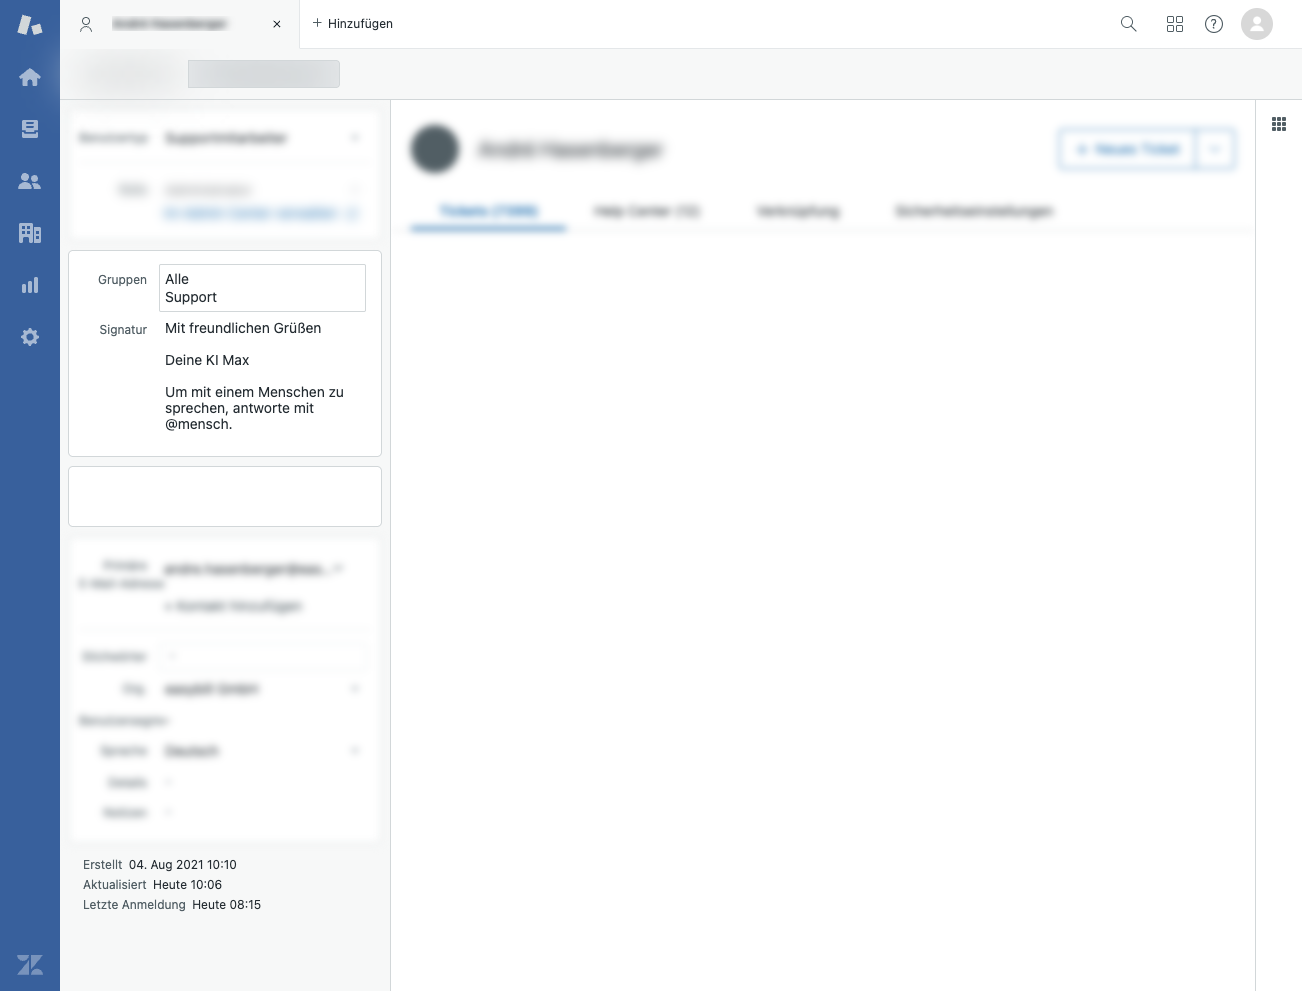
In Germany, you must declare automated systems. Edit your trigger “Inform requestor of Comment Changes” to include a disclaimer when the current group isbotBrains AI.
- With Brands access
- Without Brands access
Add the disclaimer via the brand-specific signature text:
Adding an Escalation Link to Emails
You can add an escalation link to Zendesk email notifications so customers can request a human agent with one click or by typing a keyword. The link only appears when the ticket is handled by botBrains.- In your Zendesk Admin Center, go to Objects and rules > Business rules > Triggers.
- Find the trigger that notifies requesters about comment updates (e.g. “Notify requester and CCs of comment update” / “Anfragenden und CCs über Kommentaraktualisierung benachrichtigen”).
- In the Action section, append this snippet to the email body:
- Replace
YOUR_INTEGRATION_IDwith your integration UUID (e.g.a1b2c3d4-e5f6-7890-abcd-ef1234567890). You find it in your integration settings. - Save the trigger.
Understanding the Processing of Tickets
Show the ticket to botBrains
You can trigger the execution of botBrains on a ticket by assigning it to the
botBrains AI group. Adding comments (public or private) will also trigger a rerun.Decide Response
botBrains skips the ticket if any of the following are true:
- The ticket is not assigned to the
botBrains AIgroup. - The last public comment is not from the requestor (for example, an agent replied).
- There is any response (note or public comment) after the requestor’s last public comment.
- botBrains already added an internal note to the ticket. Agents can add more notes, but those will not wake up the AI again. A requestor reply will though, so you can comment on botBrains performance, answer the human. Then let botBrains take the conversation from there to answer any follow-up questions.
Generate Response
botBrains will first predict the ticket form and then the relevant custom fields for that ticket form. It will then generate a comment. The configuration and a different system decide if that answer will be a public or a private comment (note).A ticket that is processed by botBrains will receive the
processed_by_botbrains tag. If botBrains decided that it should be a private comment, the ticket will always be escalated.Tags Used by botBrains
The User AgentbotBrains Agent makes all changes from botBrains via API.
| Tags | Meaning |
|---|---|
processed_by_botbrains | AI replied to the ticket. |
processed_by_botbrains + escalated_by_botbrains | AI processed, then escalated. |
escalated_by_botbrains + blocked_by_botbrains | Quota or blocking rule, escalated without reply. |
escalated_by_botbrains | Skipped without processing (blocked requestor or traffic sampling). |
escalated_by_botbrains + escalated_by_botbrains_failsafe | Failsafe after 2 hours. |
| Tag | Effect |
|---|---|
botbrains_force_private_mode | Forces private mode for that ticket (replies as internal notes). |
botbrains_force_sample | Bypasses traffic sampling rollout, forces botBrains to process the ticket. |
How to Escalate
botBrains will escalate all tickets that are in status New or Open after generation. This can happen through:- The AI agent calling
escalate_to_human- The AI decides the situation needs escalation - Custom Field Prediction - When choosing Custom Status setting to
Openas the next correct step
How to Retrigger Processing
To make botBrains reprocess a ticket, reassign it away from thebotBrains AI group (e.g. to any other agent or group) and then assign it back to the botBrains AI group.
Note that botBrains will choose to not reply if any of the conditions for skipping processing are met.
Integration Settings
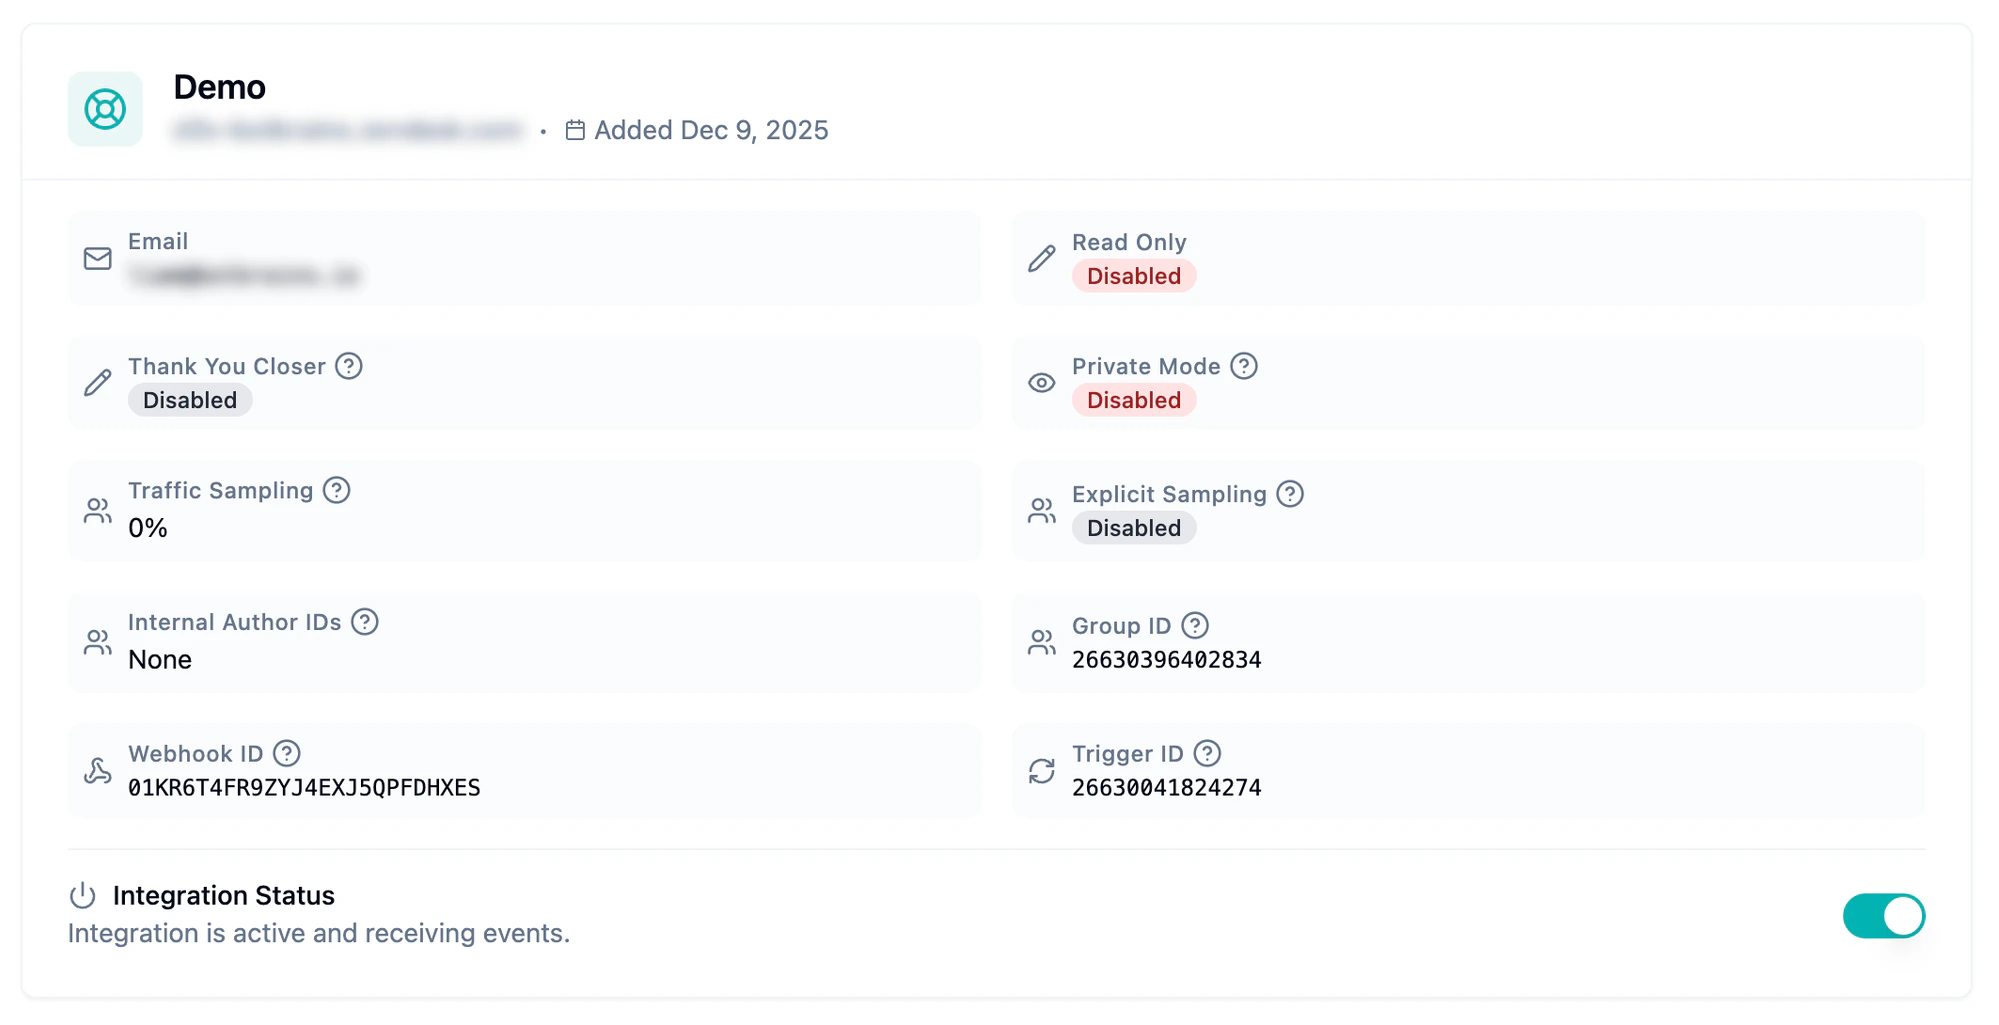
Ticket Status: New vs Open
When you assign a ticket to thebotBrains AI group, Zendesk automatically moves it from New to Open. This happens because of two built-in Zendesk rules:
- Zendesk automatically assigns all tickets in a group with a single agent to that agent.
- That assignment changes the ticket status from New to Open.
Traffic Sampling
If you have high ticket volume and want to roll out botBrains gradually, use Traffic Sampling. Set a percentage (for example 50%) to control how many newly created tickets botBrains processes. botBrains selects tickets uniformly at random, so the actual number of processed tickets matches the configured percentage. botBrains escalates tickets that fall outside the sample immediately without a reply.Explicit Sampling
Enable Explicit Sampling to make the sampling decision visible via tags. When active, botBrains adds one of two tags to every newly created ticket:| Tag | Meaning |
|---|---|
botbrains_sampled | Ticket is in the sample; botBrains will process it. |
botbrains_not_sampled | Ticket is outside the sample; botBrains won’t process it. |
botbrains_sampled tag. Because the tags follow a uniform distribution, the processed ticket volume stays close to your configured percentage.
Thank You Closer
Thank You Closer handles a common scenario: a customer reopens a solved ticket just to say “thank you.” When enabled, botBrains evaluates every ticket that moves from Solved back to Open. If the reply is a pure expression of gratitude with no open tasks, botBrains re-solves the ticket. If there are outstanding tasks, the ticket stays open. This protects your SLAs from unnecessary reopens.Ticket Field Prediction
botBrains can automatically categorize tickets and fill custom fields using AI. The Field Predictor selects ticket forms, sets priorities, fills custom fields, and adds tags based on ticket content. To configure field prediction:- Click the Predictor button on your integration card
- Enable the predictor and configure which fields to predict
- Provide instructions for each field
- Test with historical tickets
Common Questions
Automated systems post public comments on tickets and botBrains stops responding. How do I fix this?
Automated systems post public comments on tickets and botBrains stops responding. How do I fix this?
botBrains skips a ticket when the last public comment isn’t from the requestor. If an automated system (for example, a payment provider or shipping notification) posts a public comment, botBrains treats it as an agent reply and backs off.Set the Internal Author IDs field in your integration settings to the Zendesk user IDs of these automated systems. botBrains then ignores their comments when deciding whether to respond.
I want to try botBrains on a small portion of tickets first. How?
I want to try botBrains on a small portion of tickets first. How?
Use Traffic Sampling to set a percentage of tickets that botBrains processes. For example, start at 10% and increase as you gain confidence. Combine with Explicit Sampling if you want to see which tickets were sampled via tags. See Traffic Sampling and Explicit Sampling.
Customers keep reopening solved tickets just to say thanks. Can botBrains handle that?
Customers keep reopening solved tickets just to say thanks. Can botBrains handle that?
Enable Thank You Closer. botBrains evaluates every ticket that moves from Solved back to Open and re-solves it if the reply is pure gratitude with no outstanding tasks. This keeps your SLA metrics clean. See Thank You Closer.
I want botBrains to draft replies for review instead of sending them directly.
I want botBrains to draft replies for review instead of sending them directly.
Enable Private Mode. botBrains posts all replies as internal notes instead of public comments and escalates the ticket so an agent can review and send the response. Because the AI never posts a customer-visible reply in this mode, these tickets count as Private involvement, never Autonomous, which lowers your Autonomous Rate by design.
Can I force private mode for specific tickets only?
Can I force private mode for specific tickets only?
Add the tag
botbrains_force_private_mode to a ticket (for example via a Zendesk trigger). botBrains will post its reply as an internal note for that ticket only, without enabling Private Mode globally.I want botBrains to only handle tickets from certain channels or brands.
I want botBrains to only handle tickets from certain channels or brands.
Edit the “[botBrains] Assign AI” trigger in Zendesk. Add conditions like
Ticket > Channel is email or Ticket > Brand is XY to control which tickets reach botBrains. See Configuring When botBrains Should Answer.How do I make botBrains reprocess a ticket it already handled?
How do I make botBrains reprocess a ticket it already handled?
Reassign the ticket away from the
botBrains AI group (for example to another agent or group), then assign it back. This triggers a fresh processing run. See How to Retrigger Processing.I want to use botBrains Insights without botBrains changing anything in my Zendesk setup.
I want to use botBrains Insights without botBrains changing anything in my Zendesk setup.
Enable Read Only mode. botBrains receives and analyzes ticket events for Insights but won’t post any comments or modify ticket fields.